

egg incubator user manual pdf
Welcome to the Egg Incubator User Manual! This guide provides essential information for safe and effective use of your incubator, ensuring optimal hatching conditions and egg care.
1.1 Purpose of the Manual
This manual is designed to guide users in safely and effectively operating the egg incubator. It provides detailed instructions for setup, operation, and maintenance, ensuring optimal conditions for egg incubation and hatching. The manual covers essential topics such as temperature control, humidity management, and egg turning mechanisms. By following the guidelines, users can achieve successful hatching outcomes while minimizing risks. This comprehensive guide is intended to help users master the incubator’s functions and capabilities efficiently.
1.2 Safety Precautions
Before using the egg incubator, ensure it is placed on a stable, flat surface away from direct sunlight and water sources to prevent damage. Avoid overheating by maintaining a consistent power supply and proper ventilation. Keep children away from the device during operation. Do not open the incubator excessively, as this may disrupt internal conditions. Always follow the manufacturer’s guidelines to ensure safe and effective operation of the incubator.
Initial Setup and Preparation
Unbox and inventory all components, then place the incubator on a flat, stable surface. Ensure it is level and away from direct sunlight before plugging in.
2.1 Unboxing and Inventory
Carefully unpack the incubator and verify all components. Ensure the package includes the incubator unit, egg trays, water pans, and accessories like power cords and user manuals. Inspect for damage and contact customer support if any items are missing or damaged. Familiarize yourself with each part before proceeding to setup.
2.2 Placement and Leveling
Place the incubator on a stable, flat surface away from direct sunlight and drafts. Use the built-in leveling mechanism to ensure the unit is perfectly horizontal. Correct leveling is crucial for even temperature distribution and proper egg turning. Adjust the feet as needed and verify the balance using the provided spirit level or a digital leveling tool for accuracy.
2.3 Connecting Power and Initial Power-On
Plug the incubator into a nearby grounded electrical outlet, ensuring the voltage matches the device’s specifications. Avoid using extension cords. Once powered on, the control panel will light up, and the device will initiate a self-test. Allow the incubator to reach the set temperature before adding eggs. Refer to the display for confirmation of proper startup and operational readiness.

Operating the Egg Incubator
Ensure consistent temperature, humidity, and egg turning for optimal hatching. Monitor settings via the control panel and adjust as needed to maintain ideal conditions for embryo development.
3.1 Setting the Temperature
Temperature control is crucial for successful incubation. Set the incubator to 37.5°C for chicken eggs, adjusting as needed for other species. Use the control panel to regulate heat, ensuring stability. Monitor temperature regularly to avoid fluctuations, which can harm embryo development. Calibration may be required for accuracy. Always follow the manufacturer’s guidelines for optimal temperature settings to ensure proper hatching conditions.
3.2 Adjusting Humidity Levels
Humidity levels are critical for successful incubation. Set the incubator to 50-60% humidity for optimal conditions. Use the built-in control panel to adjust settings, ensuring proper moisture levels. Add water to the reservoir as needed, monitoring humidity closely. Avoid extreme levels, as they can harm egg development. Proper humidity maintenance ensures healthy embryo growth and prepares eggs for hatching. Regular checks are essential to maintain stability throughout the incubation process.
3.3 Understanding Egg Turning Mechanisms
The egg incubator features an automatic turning mechanism that rotates eggs at regular intervals, mimicking a hen’s natural behavior. This ensures even embryo development and prevents hotspots. Place eggs narrow-end down for proper rotation. Test the turning function by pressing the reset button; eggs should turn smoothly. Avoid manual turning unless necessary, as over-handling can reduce hatching success. Proper egg alignment and mechanism function are crucial for optimal incubation results.
Preparing the Eggs
Select fertile eggs for incubation, ensuring they are clean and free from cracks. Store eggs point-end down in a cool, dry place before incubation begins.
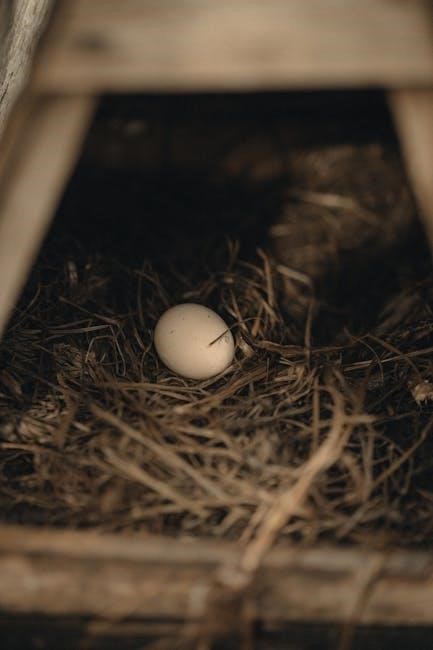
4.1 Selecting Fertile Eggs
Selecting fertile eggs is crucial for successful hatching. Choose clean, undamaged eggs with no cracks or visible defects. Ensure eggs are fresh, as fertility decreases over time. Store eggs point-end down in a cool, dry place before incubation. Avoid washing eggs, as this can damage the natural protective coating. Fertile eggs will have a visible air sac and clear, dense albumen when candled. Proper selection ensures optimal hatching results.
4.2 Storing Eggs Before Incubation
Proper storage of eggs before incubation is essential for maintaining viability. Store eggs in a cool, dry place with consistent temperatures between 50-60°F (10-15°C). Keep humidity low to prevent moisture absorption. Position eggs pointed-end down to prevent yolk movement. Avoid direct sunlight and vibrations. Use egg cartons or trays to stabilize eggs. Ensure eggs are stored for no more than 7-10 days before incubation begins. This preserves embryo health and hatching success.
4.3 Placing Eggs in the Incubator
Gently place eggs in the incubator, ensuring they are secure and evenly spaced. Position eggs with the narrower end facing down to promote proper air circulation. Avoid overcrowding to maintain optimal incubation conditions. Handle eggs carefully to prevent cracking or damage. Once placed, close the incubator lid to stabilize temperature and humidity. Ensure eggs are settled before powering on the incubator for consistent hatching results.
Monitoring and Maintenance
Regularly check temperature, humidity, and egg turning to ensure optimal conditions. Maintain a clean environment and address any issues promptly for successful incubation and hatching results.
5.1 Checking Temperature and Humidity
Regularly monitor the incubator’s temperature, maintaining it between 37.2°C and 37.8°C for optimal hatching. Humidity levels should range from 50-60% during incubation and increase to 65-75% during hatching. Use the control panel to adjust settings as needed. Ensure water reservoirs are filled to maintain humidity, and avoid extreme fluctuations. Check readings daily and perform visual inspections of egg conditions. Proper monitoring ensures healthy development and prevents issues like dehydration or overheating, crucial for successful hatching.
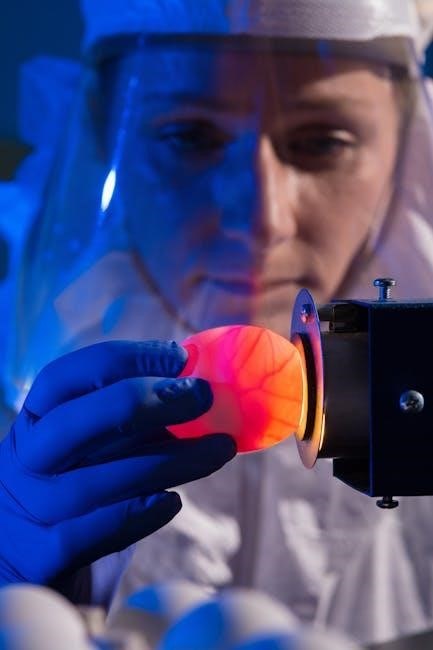
5.2 Monitoring Egg Development
Monitor egg development by candling weekly to observe embryo growth. Use an egg candler to visualize veining, movement, and dark spots indicating healthy development. Avoid candling during the first 4 days and hatching period to prevent stress. Signs of healthy development include clear progression of growth, while maldevelopment may show no growth or unusual changes. Regular checks ensure timely identification of issues, promoting successful hatching outcomes.
5.3 Adjusting Settings as Needed
Monitor temperature, humidity, and egg turning functions regularly. Adjust settings to maintain optimal conditions, using the control panel to fine-tune values. Ensure temperature stays around 37.5°C and humidity between 50-60%. If issues arise, refer to the manual for calibration guidelines. Test adjustments gradually to avoid sudden changes. Document any modifications to track incubation progress and ensure consistent conditions for successful hatching.
The Hatching Period
The hatching period typically lasts 21 days for chicken eggs. Monitor closely for signs like pipping and zipping. Maintain stable temperature and humidity for successful hatching.
6.1 Understanding the Hatching Process
The hatching process typically begins after 21 days of incubation for chicken eggs. Eggs start piping, with the embryo breaking through the shell. Monitor for signs like zipping, where the chick breaks the shell further. Maintain stable temperature (99°F) and humidity (60-70%) to support the hatching process. Avoid opening the incubator during this critical phase to ensure optimal conditions for successful hatching.
6.2 Signs of Hatching
Signs of hatching include slight shell movements, small cracks, and faint chirps from the embryo. The egg may pip, where the beak breaks through, followed by zipping, where the chick encircles the shell. Avoid assisting unless necessary, as it can harm the chick. Ensure the incubator remains closed during hatching to maintain humidity and temperature, crucial for successful emergence.
6.3 Post-Hatch Care
After hatching, gently transfer chicks to a clean, warm brooder with adequate ventilation. Provide fresh water and starter feed. Monitor their health, ensuring they are active and alert. Remove any unhatched eggs to prevent contamination. Clean and disinfect the incubator for future use. Ensure the chicks have sufficient space and maintain a safe temperature to promote healthy growth and development.

Cleaning and Maintenance
Regularly clean the incubator with mild detergent and rinse thoroughly. Disinfect all surfaces to prevent bacterial growth. Perform maintenance checks on sensors and mechanisms to ensure optimal performance and safety.
7.1 Cleaning the Incubator
Turn off the incubator and unplug it before cleaning. Remove all eggs and accessories. Use a soft cloth with mild detergent to wipe interior and exterior surfaces. Avoid abrasive materials that may scratch the finish. Rinse thoroughly with clean water to remove any soap residue. Disinfect with a diluted vinegar solution, then rinse again. Dry completely with a soft cloth to prevent water spots and bacterial growth. Regular cleaning ensures optimal performance and safety.
7.2 Storing the Incubator
After cleaning and drying the incubator, store it in a cool, dry place away from direct sunlight and humidity. Use the original packaging if available to protect it from dust and damage. Ensure all accessories are stored separately in a sealed bag. Avoid extreme temperatures or moisture, as this may affect future performance. Proper storage ensures the incubator remains in good condition for future use.

Troubleshooting Common Issues
Identify and resolve issues like temperature fluctuations, humidity alarms, or egg turning malfunctions. Consult the manual for solutions or contact customer support for assistance.
8.1 Temperature Fluctuations
Temperature fluctuations can affect hatching success. Check sensor accuracy, ensure proper ventilation, and avoid direct sunlight. Recalibrate if necessary, following manual instructions. Verify power stability and maintain consistent room conditions. If issues persist, consult the troubleshooting guide or contact customer support for assistance. Always adhere to manufacturer guidelines for optimal performance and egg health.
8.2 Humidity Alarm
The humidity alarm activates if levels deviate from set parameters. Check water reservoir levels and ensure proper ventilation. Adjust settings or add water as needed. If the issue persists, clean or replace the humidity sensor. Consult the manual for recalibration steps. Maintaining optimal humidity is crucial for egg development. Refer to troubleshooting guidelines for further assistance if the alarm continues to sound despite adjustments.
8.3 Egg Turning Malfunction
If the egg turning mechanism stops working, ensure eggs are properly placed and not obstructing movement. Check for blockages or damage to the motor. Restart the incubator and verify settings. If the issue persists, clean the turning tray or contact customer support. Proper egg rotation is vital for even development, so address malfunctions promptly to avoid complications during incubation.

Warranty and Customer Support
Your egg incubator is backed by a limited warranty. For inquiries or issues, contact our customer support team via email or phone for assistance and guidance.
9;1 Warranty Information
Your egg incubator is covered by a limited warranty for a specified period from the date of purchase. This warranty covers manufacturing defects and ensures proper functioning under normal use. For warranty claims, contact our customer support team with your purchase details. Note that the warranty may be void if the product is misused or tampered with. Always refer to the warranty terms provided with your product for full details and conditions.
9.2 Contacting Customer Service

For any inquiries, troubleshooting, or assistance, please contact our dedicated customer service team. You can reach us via email or phone, details provided in the manual. Our experts are ready to address your concerns and ensure your incubator operates smoothly. Feel free to contact us for support, and we will respond promptly to help you achieve the best hatching results.
By following this manual, you’ve successfully set up and operated your egg incubator. Proper use ensures optimal hatching conditions and healthy chick development; Always refer to the guidelines for troubleshooting and maintenance. Wishing you the best results in your hatching journey. For further assistance, contact our customer support team.